
Classic Pumpkin Pie
Lynley Jones
Classic all-American pumpkin pie made with our very own Pumpkin Pie Spice.
If you are new to pie-baking and want to make your own piecrust for this recipe (yes!), check out Great Crust Is a Must from my People Like Pie series for everything you need to know about making and handling pie dough.
Makes 1 deep-dish pie, serving about 8 (see notes if you have a standard, shallower pie plate)
Ingredients
Classic Pumpkin Pie made in the Adventure Kitchen.
3/4 cup white sugar
1.75 teaspoons Pumpkin Pie Spice (or see notes to use individual spices)
1 teaspoon coarse salt (or half this much if using table salt)
2 large eggs
1 12-ounce can evaporated milk
1 15-ounce can pumpkin puree (see notes)
1 disk (half recipe) pie crust pastry (pate brisee)
Flour for rolling out
Instructions
1. Combine sugar, Pumpkin Pie Spice and salt in a medium bowl. In a separate large bowl, whisk the eggs, then whisk the evaporated milk into the eggs, followed by the pumpkin puree.
2. Add the sugar mixture to the pumpkin mixture, stirring to combine thoroughly. Cover and refrigerate for at least 30 minutes, and up to 3 days.
3. Lightly flour your worksurface and roll the pie dough into a rough circle, about 1/8-inch thick. Gently lay a deep-dish pie plate upside down in the middle of the circle to be sure you've rolled the circle wide enough. The dough should extend about 2 or 3 extra inches beyond the pie plate all the way around (a bit less if you’re working with a standard non-deep dish pie plate).
4. When you've finished rolling the dough, transfer it to the pie plate, pressing it into the corners. Trim the overhang to about 2 inches all the way around. Fold the edges back and crimp them as desired (see notes). Set the pie plate with the trimmed dough in the refrigerator to rest for 15 minutes.
5. Preheat oven to 425 degrees Fahrenheit with the rack in the middle position. When preheated, take the pie plate and pumpkin filling out of the refrigerator. Give the filling a good stir and pour it into the chilled crust. (If you’re not using a deep dish plate you won’t need all the filling - see Notes for ideas to use the extra!). Carefully slide the pie plate into the middle of the oven and bake for 15 minutes.
6. Turn the heat down to 350 degrees and bake for another 40-65 minutes, until done. Pumpkin pie is done when the filling is puffed up and sizzling, and it jiggles like firm jello when nudged. (Exact baking time for your pie will depend on the type of pumpkin puree you used, the size and type of pie plate you’re using, and the usual mysteries of individual oven variances. So watch for the signs above to decide when it’s done!)
7. When done, remove the pie from the oven and cool on a rack for 2 hours. Once cooled, you can chill it further before serving if desired, or serve it at room temperature (I usually do the latter).
Notes:
If you don’t have our Pumpkin Pie Spice (but wait, why don’t you! It’s so delicious and you can use it in so many things!), then you can use this combination of spices in Step 1 instead: 1 teaspoon ground cinnamon; 1/2 teaspoon ground ginger; 1/4 teaspoon ground cloves.
All pumpkin purees are not created equal! Homemade pumpkin puree and some canned brands are somewhat looser, while others (like Libby's) can be a bit thicker/denser. If you are using a looser puree, your pumpkin mixture will be on the thin side before cooking, so your pie will take toward the longer end of the time span indicated to cook.
This recipe calls for chilling the filling as well as the pie crust before baking. (If this annoys you, hear me out!) No one like a soggy bottom on pumpkin pie, so this helps prevent that. The goal is to have a cold pie crust hitting that hot oven all at once, so the crust can crisp up nicely. It also makes for a convenient holiday dinner workflow because you can make the filling a day or two ahead. My strategy is to fill the crust and bake the pie first thing on Thanksgiving morning, so it’s baking while I’m prepping the turkey, which will go in the oven next. Your pie has plenty of time to cool to the perfect room temperature by dessert time.
Can you use store-bought pie dough? Of course! I do too when I’m super busy. But honestly, it always hurts my heart just a little, because of the vast VAST difference between homemade and store bought pie dough. (Why does this have to be? Why can’t someone make a super-delicious frozen pie crust pastry?? Why is this so hard??) Until the brightest minds of our time finally turn their attention to figuring that out, you can certainly use your favorite frozen pie crust pastry. This delicious pumpkin filling, combined with your sparkling personality, will make the whole thing great anyway! But please be aware that store bought pie crust is usually configured for a regular-depth pie plate, not a deep dish one. So you should definitely note all the notes below about that.
If you’re making your own pie dough (hooray!) and haven’t done it before, you will definitely want to check out this post for all the keys to success. You’ll love it!
This recipe makes enough filling for a deep-dish pie. If pumpkin pie is delicious (like this one), I always feel like there should be a bit more of it! Plus, if you’re serving a crowd, you can slice the pie into more (narrower) slices and each slice will still have a decent amount of pumpkin.
If you’re using a traditional (shallower) pie plate, you can still use this recipe, but you won't need all the filling, and cooking time will be shorter. In Step 3, start checking for doneness after about 25 minutes. You can save the extra filling and add it to your pancake batter for breakfast the next morning, or make a few of these with it for some future occasion.
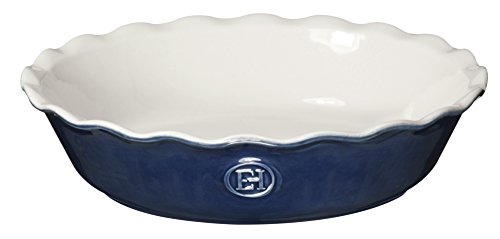
The pie plate I use for this is the Emile Henry ceramic dish (I'm including a link to the exact dish I use). I like ceramic for this because it heats gently, retains the heat for a long time, and cools down slowly. (And it looks pretty!) Pumpkin requires a long baking time, so using a dish that is more gentle with the heat turns out a nice crust. I haven't experimented with glass for this recipe, but if you have a deep-dish glass dish, I'm sure it would work great. Metal pie plates can be a bit harsh for a pie like this, heating very quickly and searing the crust well before the filling is cooked. If all you have is a metal pie plate, that shouldn't stop you from making pumpkin pie! But here is an issue that may affect you:
Because the pumpkin filling takes so long to cook, the crust can sometimes turn a bit too brown around the edges while it waits for the pie to finish. If this starts to happen, lay a ring of aluminum foil around the crust to slow things down and protect it.
Finally, when crimping the dough for a pie like this, remember that the crust contracts during baking, so crimp the crust higher than you want it to end up in the finished pie. I have about an inch of crimped crust rising above the filling before baking, which yields a nicely shaped crust in the end.
Spices and ingredients used in this recipe:

My own take on this classic fall and winter spice blend, with uber-fresh cassia cinnamon, cloves and ginger harvested this year. Beyond pumpkin pie, this is a perfect blend for baking, plus soups, stews and more. Locally made by us in small batches.
1/2 cup-sized jar.